Surgical Patient Positioning Guide
| Site: | EHC | Egyptian Health Council |
| Course: | دلائل الاجراءات التمريضية لقسم العمليات |
| Book: | Surgical Patient Positioning Guide |
| Printed by: | Guest user |
| Date: | Saturday, 20 June 2026, 10:42 PM |
Description
"last update: 9 Feb. 2025" تحميل الدليل
Table of contents
- - Prepared by
- - Supine Position (Lying on the Back)
- - Supine Position with Arm Extension
- - Shoulder or anterior extremity surgeries
- - Reverse Trendelenburg situation
- - Prone Position (Lying on the Stomach)
- - Kidney Position (Lateral Position)
- - Litho-sacral position
- - Supine Position (Lying on the Back)
- - Fowler's position
- Prepared by
Operation Room guide
Under supervision
- Prof. Dr. Mohamed Latif, CEO of the Egyptian Health Council
Dr. Kawthar Mahmoud, Head of the Egyptian Nursing Syndicate - Member of the Senate
Prepared by
|
Title |
Name |
NO. |
|
Dean Of Faculty Nursing, Professor of Medical and Surgical Nursing, Tanta University |
Dr Afaf Abdel Aziz Abdel Aziz Basal |
1 |
|
Professor Of Critical Care Nursing |
Prof.Dr/Zeinab Hussain Ali |
2 |
|
Professor And Head of the Department of Medical Surgical Nursing. Faculty-. Benha University |
Amal Said Taha Refaie |
3 |
|
Supervisor Of the Education Sector at Port Said University |
Amal Ahmed Khalil Morsy |
4 |
|
Professor Of Medical Surgical Nursing- Faculty of Nursing- Cairo University |
Dr. Hanan Ahmed Al Sebaee |
5 |
|
Head of central administration on secondment at MOHP |
Dr Neveen ab drab al0nabi Mohamed |
6 |
|
Director Of Primary Health Care Nursing Department at MOHP. |
Maysa Hosny Ahmed Tammam |
7 |
|
Supervisor Of Technical Education- EHA |
Nancy Alaa Eldeen Abd-Elbaset Ali |
8 |
|
Supervisor Of Nursing Services Development- EHA |
Sherien Mohamed Saad |
9 |
|
Assistant Professor of Maternity and Neonatal Health Nursing - Faculty of Nursing- Ain Shams University |
Assist.Perof. Dr./Heba Mahmoud Mohammed |
10 |
|
General manager of general administration of health institutes affairs |
Dr Mai Galal Ibrahim Al-Assal |
11 |
|
Participants |
||
|
Head of nursing administration at EHA |
Mr. Adham Abdel Nasser Okasha |
12 |
|
member of the Nursing administration at EHA, luxor branch |
Mr. Gehad Akram Hussein |
13 |
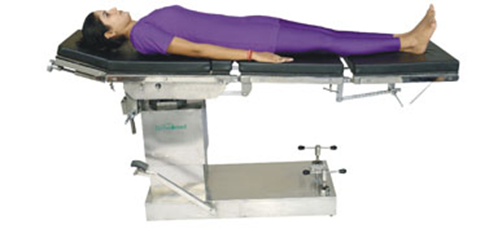
- Supine Position (Lying on the Back)
This is the most commonly used position in surgeries.
- The patient lies flat on their back, with the head facing upward.
- Arms are placed alongside the body, with shoulders relaxed downward.
- Legs remain parallel, uncrossed, and feet should not be touching.
- The head is aligned straight with the spinal column.
Required Supplies:
- Ankle roll (for foot support).
- Two elbow supports.
- Thigh strap (if needed).
Steps:
1. Position the patient on the operating table with the arms placed alongside the body.
- Legs should be straight, parallel, and aligned with the head and spine.
- Heels should be parallel to the spine.
- This ensures a natural, comfortable posture.
- Confirm that the legs are not crossed.
2. If a safety strap is placed over the patient’s knees:
- Ensure the strap is not too tight.
- If the patient is awake, explain the procedure to reduce anxiety.
3. Secure the arms with an elbow strap:
- Ensure the elbow strap is not too tight.
- Do not tuck the hands under the patient’s body.
4. Place an ankle roll under the foot joint to keep the feet from touching each other.
5. Position a pillow under the patient’s head.
6. If needed, place a small cushion under the lumbar region for extra support.
- Supine Position with Arm Extension
This position is used for:
- Mastectomy (Breast Surgery)
- Upper limb and hand surgeries
- Cases where the patient is receiving IV fluids and the anesthesiologist requires frequent access to the arm
The patient lies in a supine position with one or both arms extended.
Additional Equipment Required:
- Arm board
- Padding for the arm board
- Wrist strap
Steps:
1. Position the patient on the operating table in a supine position, ensuring the affected side is near the table’s edge.
- If the axilla is involved, position the arm below the level of the arm board.
2. Ensure the arm board is securely attached to the operating table on the affected side.
3. Place the arm on the arm board and use additional padding if necessary.
4. Do not extend the arm beyond 45 degrees from the body to prevent nerve injury.
5. Use a wrist strap if permitted by the procedure or if the arm needs to remain extended for anesthetic access.
6. Turn the patient’s face toward the affected side and slightly tilt it backward.
7. Ensure the face does not rest on the unaffected side.

- Shoulder or anterior extremity surgeries
The patient is on his back, but the affected side is elevated.
Additional equipment needed:
A small sandbag or round pillow to place under the shoulder.
Steps:
1. Position and secure the patient on the operating table as previously described.
2. Place a small sandbag or a rolled pillow under the affected shoulder to slightly elevate the shoulders from the table, ensuring proper exposure of the surgical site.
3. A safety strap may be applied over the thighs if needed.
4. Ensure the shoulders and hips are aligned evenly.
5. Arms can be positioned alongside the patient, secured with elbow supports.
6. Use additional padding if necessary or place the arm on an armboard or elevate it above the patient’s head.
o Be cautious to keep arm movements within the natural range and maintain elbow flexibility.
7. Place a pillow under the head and adjust it in one direction.
8. Place a pillow under the ankles and feet for comfort and proper support.
9. Secure the legs with a safety strap below the knees.
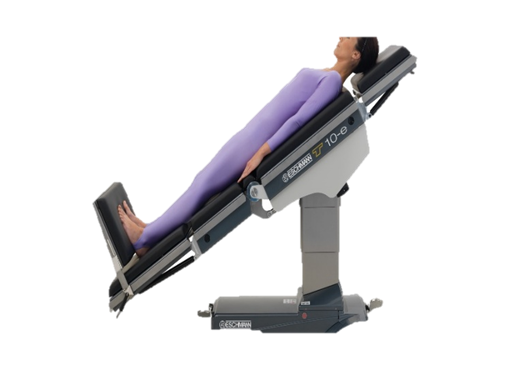
- Reverse Trendelenburg situation
This position is used for:
- Gallbladder and bile duct surgeries
- It allows the abdominal organs to shift downward, providing better access to the upper abdomen.
- Thyroidectomy (Thyroid Removal Surgery)
- Helps the patient breathe more easily and reduces blood supply to the surgical site.
Positioning Steps:
1. The patient lies supine (flat on their back) in a straight position.
2. Tilt the operating table so that the head is elevated higher than the legs.
Required Supplies for Gland Surgery:
- 2 Elbow supports
- Foot barrier
- Safety strap
- Thin pillow
- Lumbar support pillow
- Headrest pillow (small cushion)
- Padding under the knees or a pillow under the head
Steps:
1. Position and secure the patient on the operating table as described for the supine position.
- Use elbow supports to allow free arm movement.
- Place a pillow under the head.
2. Apply safety straps around the patient's legs and under the knees.
- If the patient is awake, explain the procedure to reduce anxiety.
3. Adjust the footboard at a 45-degree angle to the base of the operating table.
- Use additional padding if necessary.
4. Place a pillow under the lumbar curve for comfort.
5. Position a roll or small pillow under the knees.
6. Tilt the lower section of the operating table downward according to the surgeon’s needs.
7. For thyroidectomy (thyroid removal):
- Place a thin pillow under the shoulders.
- Position a pillow under the head, with an additional small cushion (headrest) for support.
8. Arms may be placed at the patient’s sides, secured with elbow supports.
- Use extra padding if needed for comfort and stability.
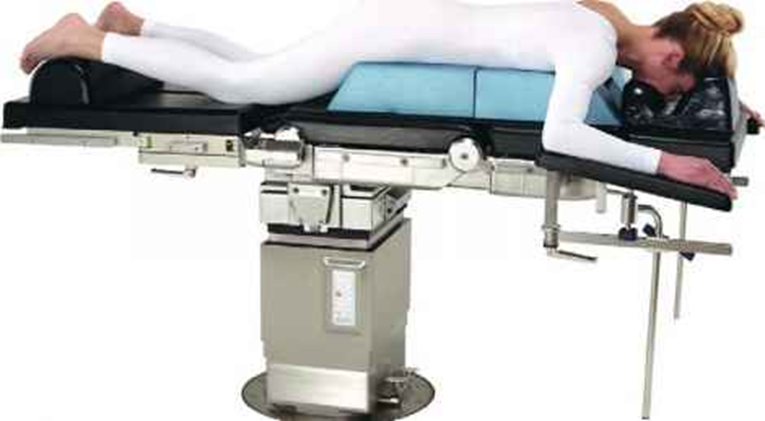
- Prone Position (Lying on the Stomach)
Prone Position (Lying on the Stomach)
This position is used for surgeries involving the lower thoracic region, spine, legs, and sometimes the rectal area.
- The patient lies on their stomach, with pillows placed to relieve chest pressure and allow proper breathing.
Additional Requirements:
- Safety strap
- Pillow under the ankle and feet
- Arm board (if needed)
- Elbow support (if needed)
- Pillow under the head
- Rolls under the armpits and chest
Steps:
1. Once the anesthesiologist gives approval, carefully and slowly turn the patient onto their stomach.
2. The anesthesiologist assists in repositioning the head and shoulders.
3. One person supports the pelvis while another lifts and turns the upper body into position.
4. Another person holds the legs and turns them at the same time as the shoulders and pelvis.
5. Arms should remain at the patient's sides, ensuring no pressure is placed on the lower arm.
6. Place support rolls under the armpits and chest to relieve pressure on the abdomen and facilitate breathing.
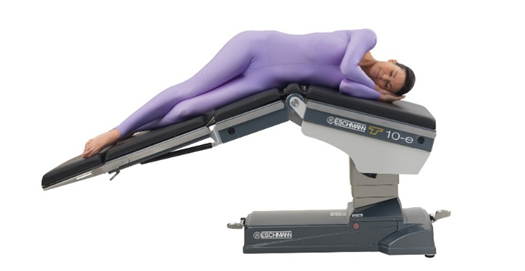
- Kidney Position (Lateral Position)
This position is used for kidney and lateral abdominal surgeries.
Key Features:
- The patient is placed in a lateral (side-lying) position.
- The kidney region is positioned over the table’s break point.
- When the table is flexed, the surgical area is fully extended, providing better exposure.
- The body remains straight from the shoulders to the pelvis.
Additional Requirements:
- Arm support
- Safety strap over the pelvis (hip area)
- Pillow between the knees
- Pillow between the ankles
- Safety strap on the lower leg
Steps for Kidney (Lateral) Positioning:
1. Once the patient is anesthetized and the anesthesiologist approves movement, carefully turn the patient onto the unaffected side.
- The back should be at the edge of the table, with the kidney region positioned over the table’s break point.
2. The anesthesiologist provides support for the head and shoulders during positioning.
3. One arm is placed under the pelvis, while the other rests on top of the pelvis to help lift and position the patient.
4. Legs are positioned as follows:
- The lower leg is bent, while the upper leg remains straight.
5. Place a large pillow between the legs and another pillow under the ankles for support.
6. Secure the legs with a safety strap over the knees.
7. Position the lower arm on a padded arm support and secure it at the wrist with a wrist strap.
8. Raise and bend the upper arm at the elbow, placing it under the patient’s head for support.
9. Place a pillow under the patient’s head for comfort.
10. Position a backrest behind the patient and secure it to the operating table.
11. Use additional padding if needed for extra comfort.
12. Place a chest support in front of the patient and secure it to the operating table.
- This should be well-padded to prevent chest bruising.
13. Secure the patient’s body with another safety strap over the pelvis.
14. Flex the operating table at the midpoint to optimize kidney exposure.
- If a kidney elevator is available, use it to lift the area between the ribs and the iliac bone as needed.
- The head should be slightly tilted downward.
15. Before closing the surgical incision, return the table to a straight position to allow for better tissue approximation.
- Litho-sacral position
Lithotomy Position (Dorsosacral Position)
This position is used for:
- Vaginal surgeries
- Rectal (anal) surgeries
- Certain cystoscopy (bladder endoscopy) procedures
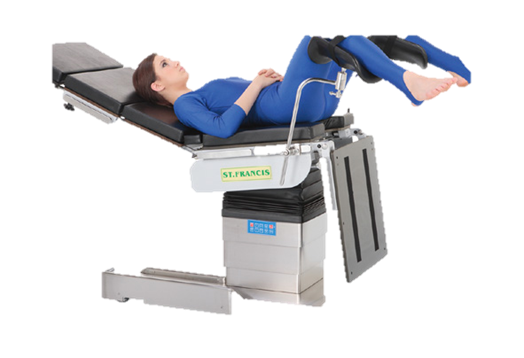
Positioning Steps:
1. The patient lies on their back with the legs positioned on the lower section of the operating table, forming a 90-degree angle with the body.
2. The knees are bent, and the legs are rotated outward, supported by leg holders.
3. The feet should hang freely from the straps, ensuring proper support.
4. The buttocks are positioned toward the edge of the operating table, allowing optimal surgical access.
Additional Requirements:
- 2 Leg Holders with Straps
- 2 Small Pillows
- 1 Head Pillow
- 2 Elbow Supports
Steps for Lithotomy Positioning:
1. Once the patient is anesthetized and the anesthesiologist gives approval, begin positioning.
2. Move the patient upward on the table so that the buttocks are positioned over the table’s curve between the legs and upper body.
o Ensure that the buttocks do not rest directly on the table’s edge.
3. Lift and secure the patient's legs.
4. Adjust the lower section of the operating table downward to its maximum angle, ensuring it forms a 90-degree angle with the upper body.
5. Alternative method (if positioning before anesthesia):
o Lower the foot section of the table.
o Position the patient so that the buttocks are at the edge of the table.
o Secure the legs on temporary supports until they can be placed in the leg holders after anesthesia.
6. Attach the leg holders to the clamps on both sides of the table.
o Adjust the holders to be at the same height and aligned with each other.
o Ensure the clamps are securely fastened.
7. Two personnel are required to lift the legs simultaneously.
o Hold the foot with one hand and support the knee with the other.
8. Gently place the legs into the leg holders.
9. Secure the feet in the straps, ensuring:
o One strap wraps around the sole of the foot.
o Another strap wraps around the ankle joint.
o Ensure the straps are not twisted.
10. Place padding between the legs and the leg holders for comfort and to prevent pressure injuries.
11. Position the arms across the abdomen and secure them either with:
- A rolled blanket around the elbows.
- Elbow supports.
12. Place a pillow under the patient's head for support.
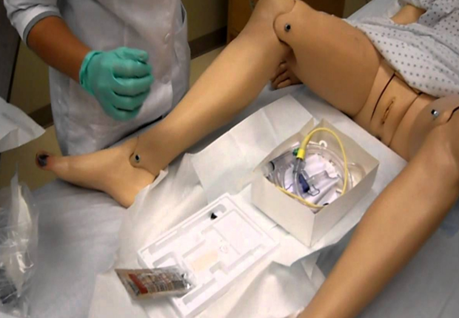
- Supine Position (Lying on the Back)
This position is used for:
- Vaginal examinations
- Insertion of a urinary catheter in women
Positioning Steps:
1. The patient lies on their back in a supine position.
2. The knees are bent.
3. The heels are placed together.
Required Equipment:
- 1 Pillow under the head
- 1 Pillow under the knees (if needed)
Steps:
1. Position the patient in a supine position (lying on their back) with their arms secured over the abdomen.
2. Bend the legs at the knees, allowing the thighs to rotate outward.
3. Bring the heels close together, nearly touching, while keeping them flat on the table.
4. A pillow may be placed under the knees for additional comfort if required.
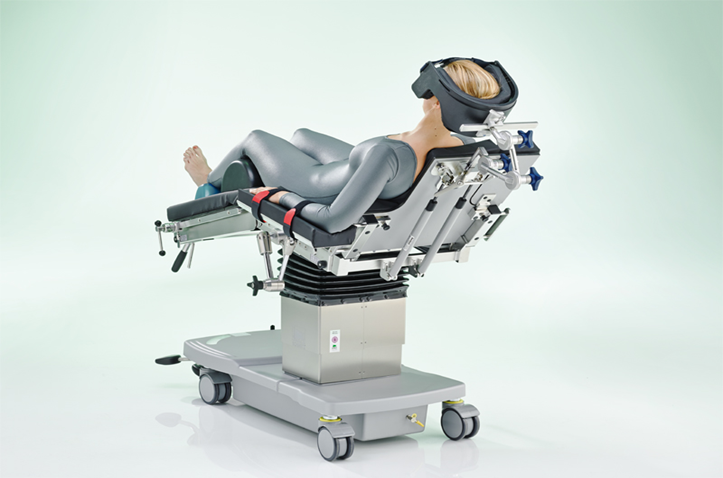
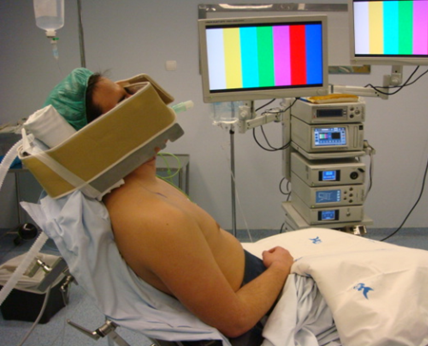
- Fowler's position
This position is used for cranial
(skull) surgeries.
The patient is positioned semi-upright, with the operating
table tilted and secured to achieve the correct posture.
Required Equipment:
- Headrest
- Safety strap
- Large pillow
- Footrest
Steps:
1. Position the patient on the operating table in a supine position, aligning their body with the lower curved section of the table.
2. Secure the footrest at the end of the table and elevate it.
o Add extra padding if needed for comfort.
3. Lower the feet slightly below the table level, ensuring the knees remain bent.
4. Raise the upper body at a 45-degree angle, ensuring back support and comfort.
5. Place a large pillow on the patient’s lap and rest the arms on it.
6. Secure the legs with a safety strap placed above the knees.
7. Position the headrest at the top of the table to support the patient’s head comfortably.
8. Ensure all body parts are securely positioned on the table.
9. Tilt the head section of the table slightly downward to prevent the patient from sliding forward.