Intravenous Therapy for Newborns
| Site: | EHC | Egyptian Health Council |
| Course: | دلائل الاجراءات التمريضية لقسم حديث الولاده |
| Book: | Intravenous Therapy for Newborns |
| Printed by: | Guest user |
| Date: | Saturday, 20 June 2026, 10:58 PM |
Description
"last update: 12 February 2025" تحميل الدليل
- Prepared by
NICU guide
Under supervision
- Prof. Dr. Mohamed Latif, CEO of the Egyptian Health Council
Dr. Kawthar Mahmoud, Head of the Egyptian Nursing Syndicate - Member of the Senate
Prepared by
|
Title |
Name |
NO. |
|
Dean Of Faculty Nursing, Professor of Medical and Surgical Nursing, Tanta University |
Dr Afaf Abdel Aziz Abdel Aziz Basal |
1 |
|
Professor Of Critical Care Nursing |
Prof.Dr/Zeinab Hussain Ali |
2 |
|
Professor And Head of the Department of Medical Surgical Nursing. Faculty-. Benha University |
Amal Said Taha Refaie |
3 |
|
Supervisor Of the Education Sector at Port Said University |
Amal Ahmed Khalil Morsy |
4 |
|
Professor Of Medical Surgical Nursing- Faculty of Nursing- Cairo University |
Dr. Hanan Ahmed Al Sebaee |
5 |
|
Head of central administration on secondment at MOHP |
Dr Neveen ab drab al0nabi Mohamed |
6 |
|
Director Of Primary Health Care Nursing Department at MOHP. |
Maysa Hosny Ahmed Tammam |
7 |
|
Supervisor Of Technical Education- EHA |
Nancy Alaa Eldeen Abd-Elbaset Ali |
8 |
|
Supervisor Of Nursing Services Development- EHA |
Sherien Mohamed Saad |
9 |
|
Assistant Professor of Maternity and Neonatal Health Nursing - Faculty of Nursing- Ain Shams University |
Assist.Perof. Dr./Heba Mahmoud Mohammed |
10 |
|
General manager of general administration of health institutes affairs |
Dr Mai Galal Ibrahim Al-Assal |
11 |
|
Participants |
||
|
Professor of Obstetrics and Gynecology Nursing |
Dr. Nagat Salah Shalabi Salama |
12 |
|
member of the Nursing administration at EHA, port said branch |
Mrs. Shaima Abdel Basset Ibrahim Salim |
13 |
|
member of the Nursing administration at EHA, port said branch |
Mrs. Hoda Al-Sayd Muhammad |
14 |
|
member of the Nursing administration at EHA, port said branch |
Mrs. Walaa Ahmed Ali |
15 |
|
member of the Nursing administration at EHA, port said branch |
Mrs. Omnia Abdel Qader Muhammad |
16 |
|
member of the Nursing administration at EHA- South Sinai branch |
Mrs. Yasser Abdel Karim Omar Abdel Jawad |
17 |
- Intravenous injection and management of intravenous fluids for neonates
Fluids make up approximately 80% of a newborn’s total body weight, which is a significant percentage, especially in low birth weight and preterm infants. Therefore, maintaining fluid balance and meeting the body's fluid requirements is crucial, particularly in the first few days of life. The fluid loss at this stage is due to the redistribution of fluids within the body rather than actual tissue loss, which leads to a physiological weight loss of about 5% to 10% of the neonate’s body weight.
Fluid Loss Mechanisms in Neonates:
- Through the skin or respiratory system: Insensible water loss (IWL) occurs through water vapor in exhaled air, which increases with an elevated respiratory rate.
- Through the gastrointestinal system: Sensible water loss occurs due to diarrhea, vomiting, or nasogastric suction.
- Through the urinary system: Water loss occurs in the form of urine.
Additional Factors Increasing Insensible Water Loss and Fluid Needs:
✔ Premature birth and low birth weight
✔ Phototherapy, which increases fluid needs by approximately
20% of the daily requirement
✔ Elevated body temperature
Steps for Mixing Intravenous Solutions
1. Preparation
- Labels must be written according to hospital identification policies, including the neonate’s name (son/daughter of) and the mother’s full name and file number.
- The required amount and type of solution must be documented.
- Staff should wear a face mask covering the nose and mouth and a head cap.
2. Preparing the Work Area
- Hands must be routinely washed, and clean gloves should be worn.
- The preparation surface should be disinfected using an appropriate antiseptic, such as 70% alcohol, by wiping in a single direction from the inside out.
- Gloves should be removed, and hands should be washed again.
3. Gathering the Necessary Materials
A sterile towel or sheet should be placed on part of the
preparation surface, while all required tools should be arranged on the other
part. These include:
✔ A new syringe and needle for each vial of solution or
medication, based on the required amount
✔ Sterile cotton and 70% ethyl alcohol to disinfect multi-use
vial openings
✔ The prescribed solutions and medications, after removing
their plastic coverings, and checking for expiry dates, cracks, leaks, or contamination
before use
✔ Two sterile gloves
✔ A metal container for disposing of excess solution
Ensuring the Availability of the Following:
✔ A safety box for disposing of sharp waste (needles and
ampoules)
✔ A waste bin with a red bag
4. Preparing the Base Solution (The Primary Solution with the Largest Volume Needed)
- The lead nurse and the assisting nurse should wash their hands thoroughly and disinfect them with alcohol according to infection control policies. They should then wear sterile gowns and gloves.
- The assisting nurse disinfects the openings of solution vials and ampoules using a new alcohol swab for each multi-use vial or ampoule and opens the syringe packaging.
- The lead nurse receives a new syringe and needle from the assisting nurse after removing the cover without touching critical areas.
- The nurse removes the plastic cap from the solution vial and inserts the needle to withdraw excess volume before reinserting the necessary amount per the medical prescription.
- The syringe is discarded after the final withdrawal of the solution.
5. Adding Secondary Solutions to the Base Solution
- The lead nurse receives a new syringe and needle from the assisting nurse after the packaging is removed.
- The needle is inserted into the secondary solution vial, and the required volume is drawn before being added to the base solution vial.
- The syringe is detached from the needle, leaving the needle in the base solution vial.
- If additional solutions need to be added, the steps are repeated.
6. Adding Medications to the Base Solution
- The assisting nurse opens the medication ampoule per the medical prescription and prepares a new syringe.
- The lead nurse draws the required medication dose and injects it into the base solution vial.
- If additional medications are needed, the process is repeated.
- Used syringes are disposed of in the safety box immediately.
7. Completion of the Preparation Process
✔ Solutions should be labeled with barcodes for each neonate
per hospital identification policies.
✔ The prepared solutions are delivered on a clean tray to the
responsible nurse in the unit or stored in the refrigerator (unused solutions
must be discarded after 24 hours).
✔ Syringes, needles, and waste are disposed of in their
designated areas.
✔ The preparation area is cleaned and disinfected.
✔ Gloves are removed, and hands are washed thoroughly.
General Guidelines for Administering IV Solutions:
- IV fluids should be given through a peripheral vein or a central vein (umbilical vein).
- Maintain strict aseptic techniques during preparation.
- Always use a closed IV system.
- Use an infusion pump to prevent errors in fluid administration, especially in preterm or low birth weight neonates.
- Monitor the infusion rate every hour.
- Document the time and date of IV line placement in the records.
- Review physician orders daily, even if they are the same as the previous day.
- Blood and blood products should be administered through a peripheral vein and never through an umbilical artery or peripheral artery.
- Follow the hospital’s high-risk connection identification policy during blood and medication administration.
- Do not mix medications in the same syringe. Instead, administer each drug separately as follows:
- Stop the IV fluid infusion.
- Inject the first medication.
- Flush the IV line with saline.
- Inject the second medication.
- Flush with saline again before resuming IV fluids.
- If the medications are compatible with the IV fluid, use a three-way stopcock after consulting the pharmacy.
Nursing Care During IV Fluid Administration:
1. Preparing the Equipment
✔ IV solution as per the doctor's prescription
✔ Cannula or umbilical catheter
✔ IV infusion set
✔ Three-way stopcock
✔ Sterile gloves
✔ 70% ethyl alcohol
✔ Sterile gauze
✔ Kidney dish
✔ Adhesive tape
✔ Waste bin with a red bag and safety box
2. Infection Prevention Measures
✔ Routine hand washing or alcohol hand rub (70%)
✔ Use of sterile gloves when inserting IV lines
✔ No needle should be inserted into the rubber port of the IV
set for drug administration in a central line; instead, a three-way stopcock
should be used
✔ Frequent monitoring of the IV site for swelling, infection,
or leakage, and immediate removal if complications arise
✔ Warm compresses followed by cold compresses should be
applied to swollen areas after IV removal
3. Steps for IV Fluid Administration
✔ Verify neonate identity and IV solution prescription
✔ Routine hand washing and wearing sterile gloves
✔ Disinfect the IV line connection port with 70% alcohol
before attachment
✔ Ensure the IV set does not touch unsterile surfaces
✔ Adjust the infusion rate per doctor's orders and monitor
hourly
4. IV Site Dressing Change
✔ Change dressings daily or if they become wet or soiled
✔ Use minimal adhesive tape on the skin
✔ Record the date, time, and personnel who inserted the IV
line on the dressing
5. Blood Glucose Monitoring
✔ Blood glucose levels should be measured every six hours or as per the physician’s orders
6. Fluid Balance Chart
✔ Nurses should document fluid intake and output on the
neonate's medical record every hour
✔ Fluid intake includes:
- Oral or nasogastric feedings
- IV fluids (including total parenteral nutrition)
- Saline flushes
✔ Fluid output includes: - Urine and stool (by weighing diapers)
- Gastric aspirates, vomiting, or suctioned secretions
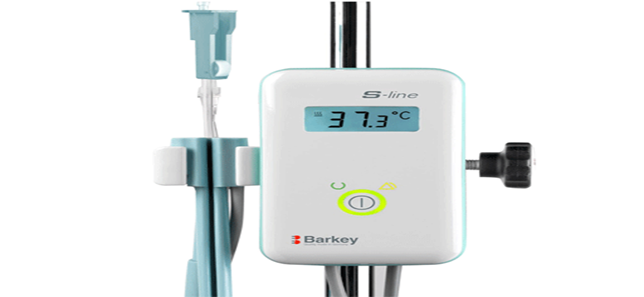
Blood Warmer
- Implementation of the Treatment Plan
- Monitor vital signs and record additional physician-ordered observations.
- Calculate and monitor fluid and caloric intake.
- Administer prescribed medications.
- Provide required interventions (oxygen therapy, phototherapy, physiotherapy, exchange transfusion, blood transfusion, pain management, pre/postoperative care, etc.).
Daily Medication Plan
- Physician prescribes type and dose.
- Nurse prepares and administers medication, ensuring proper knowledge of drug indications, side effects, and required precautions.
First: Dispensing the Medication
- The nurse assigned to provide neonatal nursing care, according to the task distribution, reviews the infant’s treatment chart (paper or electronic) to verify discontinuation, continuation, dose modification, or addition of any medication.
- The paper treatment chart is submitted to the pharmacy for dispensing the medications to the unit.
- Additionally, the prescription is verbally communicated to the pharmacist, who authorizes dispensing.
- The pharmacy prepares the medications and delivers them to the nurse responsible for the infant, whether through a single-dose system or daily doses.
Second: Preparation of the Medication
- The nurse responsible for preparing IV fluids in the unit is also responsible for preparing the medication under full aseptic conditions and following infection control policies.
- Alternatively, preparation can be performed in Laminar Air Flow Units.
Before preparation, the nurse must ensure the following:
- Verify the medication’s expiration date.
- Carefully inspect the container for cracks or defects, and check that the medication is stable in terms of appearance, composition, and color.
- Prepare the appropriate number of containers to cover all infants’ required doses, coordinating with the medication administration schedule.
- Label the container immediately after preparation with the date and time.
- Single-dose ampoules are preferred over multi-dose vials.
- If multi-dose vials must be used, always use a sterile syringe and needle to penetrate the rubber stopper.
- Disinfect the vial’s entry point with 70% alcohol before each withdrawal.
- Use a new sterile syringe for every withdrawal.
- Routine handwashing or alcohol-based hand rubbing must be performed before preparing medications or fluids.
Third: The Nurse’s Role During Medication Administration
- Administer the medication at the prescribed dose, correct time, and via the proper route, according to the physician’s instructions:
- Read the prescription carefully from the infant’s medical chart.
- Document the prescription on the treatment card.
- Withdraw the dose in the designated preparation area while observing infection control precautions.
- Avoid mixing medications to prevent harmful chemical interactions.
- Use a new sterile syringe for each medication.
- Reconfirm the dose before administration via IV cannula.
- Follow the Ten Rights of Medication Administration:
- Right drug
- Right patient
- Right dose
- Right route
- Right time
- Right frequency
- Right documentation
- Right therapeutic effect
- Right of refusal (by the infant’s family)
- Right to education (for the infant’s family)
Precautions to Follow
- Reconstituted ampoules must be diluted only with sterile water, not saline.
- Vital signs must be checked before and after drug administration.
- Certain drugs (e.g., Lanoxin) must not be given if the infant’s heart rate is below 100 bpm.
- For drugs such as Lasix, blood pressure must be checked before administration, and urine output monitored daily to avoid dehydration and electrolyte imbalance.
- Some medications must be given very slowly IV (e.g., Calcium, Sodium Bicarbonate).
- Monitor heart rate during administration of drugs such as calcium.
- Allergy testing must be performed when prescribed, and the infant’s general condition observed during and after administration for adverse reactions (e.g., rash, skin discoloration, changes in vital signs).
- In case of suspected reaction, stop the drug immediately, notify the physician, inform the hospital’s pharmacovigilance officer, and report the event using an Occurrence Variance Report (OVR) to the Quality Department.
- Do not administer missed doses unless ordered by the physician.
- Document all administered medications in the patient’s chart.
Oral Medication Administration (via the Gastrointestinal Tract)
- Use a calibrated medicine measure for liquid doses.
- Clean the bottle opening thoroughly after each use.
- For dropper medications, ensure the exact number of drops or measured volume.
- Hold the calibrated measure at eye level when pouring the medication.
- Do not use medications that have changed in color or consistency, and always check expiration dates.
Common Medication Errors
- Wrong dose (due to physician, pharmacy, or nursing errors).
- Wrong drug (due to similar names, poor documentation, or dispensing errors).
- Confusion between similar-looking or similar-colored drugs.
- Administering medication to the wrong infant (e.g., due to similar names).
- Incorrect timing of doses.
- Duplicate administration of the same chemical drug under two different trade names.
Prevention of Medication Errors
- Ensure nurse alertness and knowledge of the correct dose before administration, confirming with the physician or pharmacist if needed.
- Read every medical order carefully and attentively.
- Verify that the pharmacy dispensed the exact drug and quantity prescribed.
- In cases where infants share similar names, apply strict Patient Identification Policy measures.
- Administer medications at accurate times, since dosing intervals are calculated based on drug half-life and therapeutic effect.
- Double-check the name and details on the medication label.
Procedures in Case of a Medication Error
- Assess the infant’s condition immediately to determine severity of adverse reactions.
- Classify the level of risk without delay.
- Notify the head nurse and the treating physician immediately to decide on corrective interventions.
- Document a detailed report describing the infant’s condition and the medical measures taken to preserve the infant’s safety.
- Blood Transfusion and Its Components
Components of Blood:
- Plasma: Represents 55% of the total blood volume.
- Blood Cells: Represent 45% of the total blood volume.
Clinical Uses of Blood and Blood Components
|
Indications for Blood or Component Transfusion |
Components |
Blood Derivatives |
|
Severe hemorrhage and shock (e.g., placental abruption, pulmonary or intracranial bleeding) |
All blood components |
Whole blood |
|
Anemia |
Red blood cells after plasma separation (hematocrit 60–80%) |
Packed red blood cells |
|
Hemorrhage due to thrombocytopenia |
Platelets |
Platelet concentrate |
|
Neonates with bleeding due to coagulation factor deficiency, DIC, or hypovolemia (increased blood viscosity) |
Plasma separated and frozen |
Fresh frozen plasma |
|
Hemorrhage due to coagulation factor deficiency (e.g., hemophilia) |
Specific clotting factors separated from fresh frozen plasma |
Cryoprecipitate |
|
Hypoalbuminemia |
Plasma protein (albumin) |
Albumin |
Required Equipment
- Blood bag or the required derivative.
- Neonate identification slip (with full name and medical record number).
- Blood transfusion set.
- Sterile gloves.
- Normal saline solution.
- Adhesive tape.
- Cannula (size 22).
Preparation for Blood Transfusion
- Withdraw 2 ml of the neonate’s blood for:
- Blood grouping.
- Rh factor determination.
- Cross-matching test.
- Label the test tube with:
- Neonate’s name.
- Medical record number.
- Send the sample to the blood bank with a blood transfusion request form containing the patient’s barcode.
Procedure of Blood Transfusion
- Transfusion is carried out only upon a written medical order.
- Informed consent must be obtained from the parents after explaining the rationale.
- Perform hand hygiene and prepare the necessary equipment.
- Verify neonate identification (name and medical record number) according to hospital policy.
- The physician and nurse must jointly verify:
- The neonate’s name, blood group, and Rh factor on the blood bag.
- The cross-matching results.
- The bag serial number matches the neonate’s identification slip.
- Screening tests confirm that the blood is free from infectious diseases.
- Confirm:
- The required blood volume.
- The expiry date on the blood bag.
- Initiate transfusion using the transfusion set connected to the blood bag.

Blood
Warmer
- Ensure that the blood is free from clots.
- Monitor the neonate’s vital signs and record them in the medical file.
- Transfusion must be performed under the supervision of a neonatologist.
- The blood bag should be kept at room temperature for no longer than 30 minutes (or as per institutional policy). Warming the bag using hot water or any heat source is strictly prohibited to avoid hemolysis.
- Blood must pass through a dedicated blood filter during administration via a direct intravenous cannula; mechanical pumps must not be used for red blood cells to prevent hemolysis.
- The neonate should be connected to a cardiac monitor to observe vital signs throughout the transfusion.
Essential Precautions in Neonatal Blood Transfusion
1. Blood Safety
- The transfused blood must be free from all infectious viruses, particularly Cytomegalovirus (CMV), Hepatitis B & C, and HIV.
2. Type of Blood
- Irradiated blood is preferred whenever possible, as irradiation prevents lymphocyte proliferation, reducing the risk of transfusion-related graft-versus-host disease.
- Indications for irradiated blood include:
- Neonates weighing <1200 g at birth.
- Neonates with immunodeficiency disorders.
- Neonates receiving blood from a first-degree relative.
3. Venous Access
- Use a 22-gauge IV cannula; smaller sizes may cause hemolysis.
- Arterial lines and umbilical arterial catheters must never be used for transfusion.
- The IV line used for parenteral nutrition should not be used for transfusion simultaneously; the transfusion cannula must be removed immediately after the procedure.
- No medications or solutions may be added to the blood bag or its components.
- After transfusion, flush the IV cannula with normal saline to prevent clot formation.
- If transfusion is slow, blood glucose levels should be checked hourly as per physician’s instructions, to avoid hypoglycemia.
4. Monitoring for Transfusion
Reactions
Signs of transfusion reactions include:
- Fever > 38°C.
- Tachycardia.
- Respiratory distress.
- Hypotension.
- Facial flushing.
- Irritability.
- Vomiting.
- Hematuria (+1 or more on urine dipstick).
- Skin rash.
5. Management of Transfusion
Reactions
If any reaction occurs:
- Immediately stop the transfusion.
- Flush the IV cannula with normal saline.
- Notify the attending physician for immediate assessment.
- Monitor and record vital signs every 15 minutes until the neonate stabilizes.
- Report the event to the blood bank physician.
- Send the neonate’s medical file, the blood bag, and the transfusion set back to the blood bank.
- Send the first available urine sample for urgent analysis.
- Administer antihistamines before subsequent transfusions, as directed by the physician.
- Complete and document the blood transfusion reaction report.
6. Post-Transfusion Care
- Administer 10 ml of normal saline.
- Record all transfusion-related details in the neonate’s chart.
- Monitor vital signs hourly after transfusion.
- Complete the blood transfusion follow-up form.
- Monitor for potential transfusion-related complications (see Table 26–2).
Table 26–2: Blood Transfusion Complications
|
Adverse Effect |
Cause |
Prevention / Management |
|
Septicemia |
Bacterial contamination of blood |
Use blood within 4 hours of release from blood bank; strict asepsis; perform blood cultures if contamination is suspected. |
|
Hypothermia |
Rapid transfusion of cold blood |
Warm blood to room temperature; maintain neonate’s warmth during transfusion. |
|
Fluid overload |
Rapid transfusion of large blood volumes |
Transfuse slowly (except in emergencies); diuretics (e.g., furosemide) may be used if prescribed. |
|
Hypocalcemia (tremors, seizures) |
Citrate anticoagulant in stored blood |
Monitor serum calcium; ECG monitoring; IV calcium as indicated. |
|
Hyperkalemia |
Potassium accumulation in stored blood |
Monitor serum potassium; ECG monitoring; IV diuretics (e.g., furosemide) as indicated. |
Transfusion Time Limits
- The transfusion time is calculated from the moment the blood leaves the blood bank refrigerator.
- The longer the blood remains at room temperature, the greater the risk of hemolysis and bacterial contamination.
|
Blood Component |
Minimum Time |
Maximum Time |
|
Whole blood / Red blood cells |
2 hours |
4 hours |
|
Fresh frozen plasma |
30 minutes |
4 hours |
|
Platelets |
5–15 minutes per unit |
4 hours |
|
Cryoprecipitate |
2 minutes per unit |
4 hours |