
كتاب
العناية التنموية المسانده لحديثي الولاده
- اللمس الإیجابي والتدلیك
ھو حدیث صامت بین مقدم الخدمة والولید یھدف إلى لمس الجلد بطریقة تدل على الحب والحنان ویشمل:
(Light finger tipping) الطبطبة بأطراف الأصابع
(Resting a hand) وضع الیدین على جلد الولید
(Containment) احتواء الولید
(Massage) التدلیك
فوائد اللمس الإیجابي
· یُعطى الولید الإحساس بالأمان والطمأنینة من خلال تعلیمھ بأن ھناك نوعًا آخر من اللمس لن یتعرض فیه للألم.
· یُساعد الولید على الرجوع إلى حالة الھدوء بعد تعرضھ لإجراء مؤلم.
· یُقلل من توتر الولید الناتج عن فصله عن أمه.
· یُزید من قدرة الولید على التحكم في نفسه.
) اللمس الإیجابي للولید (
( تدلیك الولید (
التدلیك :
یعني المرور برفق على الجلد بالأیدي بھدف إحداث تأثیر ملطف، ومریح، وباسط للعضلات.
فوائد التدلیك
· .(Apnea of prematurity) یُقلل من تكرار نوبات توقف التنفس للولید ناقص النمو
· یُساعد الولید على الوصول بسرعة إلى تغذیة كاملة عن طریق الجھاز الھضمي.
· .(Oxygen saturation) یُساھم في تحسین نسبة تشبع الدم بالأكسجین
· یُحسن الدورة الدمویة للولید.
· یُساعد الولید على الاسترخاء.
· یُساعد الولید ناقص الوزن على النوم العمیق لفترات طویلة.
· یُساعد الولید ناقص الوزن على اكتساب المزید من الوزن.
· یُقلل من فترة إقامة الولید بالمستشفى.
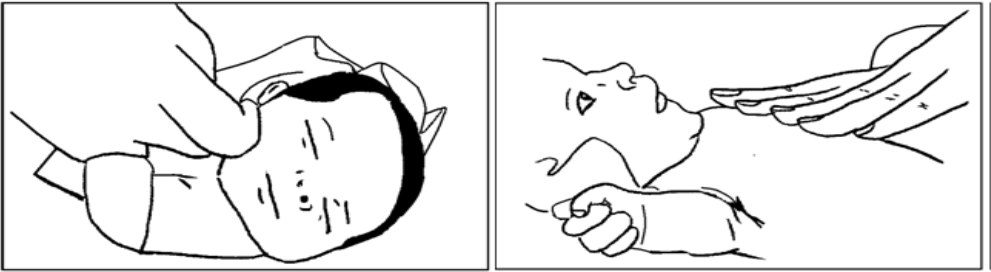
خطوات التدلیك
في البدایة یكون الولید في وضعیة النوم على البطن، ثم یتم عمل ٦ مسحات بالیدین لكل خطوة مما یلي:
١ - من بدایة الرأس وحتى نھایتھا، ثم العكس.
٢ - بدءً من الرقبة إلى الكتفین، ثم العكس.
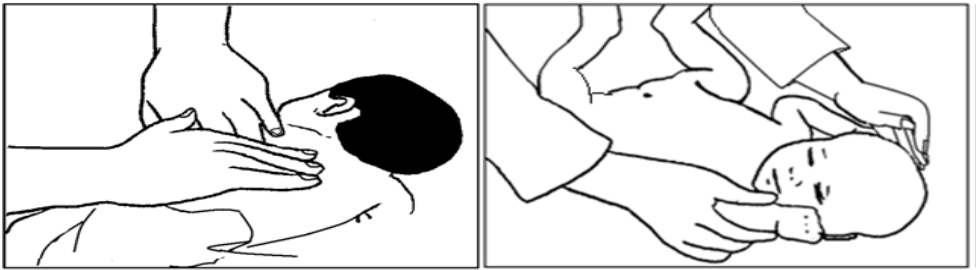
٣- بدءً من الكتفین حتى نھایة الجذع، ثم العكس بمحاذاة العمود الفقري.
٤ - بدءً من الكتفین حتى الرسغین، ثم العكس مُرورًا على الجزء الخلفي من الذراعین.
٥ - بدءً من الحوض حتى الكعبین، ثم العكس مُرورًا على الجزء الخلفي من الساقین.
ثم یُقلب الولید بحیث یصبح في وضع النوم على الظھر لعمل ٦ مرات ثني وفرد:
١ - للذراعین كلِّ على حده، مع التثبیت بمحاذاة عظمة الترقوة.
٢ - للساقین كلِّ على حده، مع التثبیت بمحاذاة عظام الحوض.
٣- للساقین معًا في وقت واحد، مع الإمساك بمفصل الكاحل.
ثم یقلب الولید لیصبح في وضع النوم على البطن مرة أخرى:
تكرر الخطوات من ١ إلى5
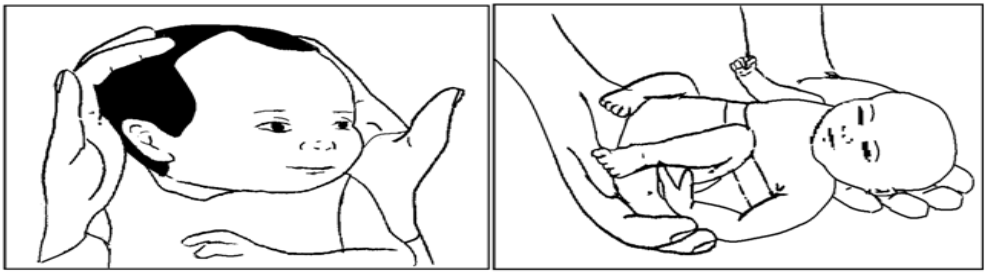
( تحویط الولید (